.png?width=512&height=100&name=Logo%20(side-by-side).png)
Contents
1. Register or Join an Organisation in PRODA
1.1 Login to your PRODA account (https://proda.humanservices.gov.au/) and click on the Organisations tab in the top right corner.

If you do not see your organisation listed here, you'll need to either Join or Register your organisation. If you or anyone else has previously used PRODA to register your organisation, registered then go to step 1.2. If you do not see your organisation here, and no-one else in your organisation has previously registered with PRODA, go to step 1.3.
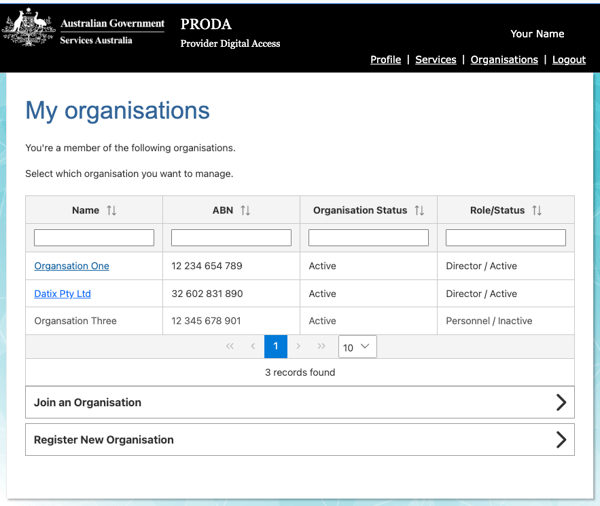
Join an Organisation
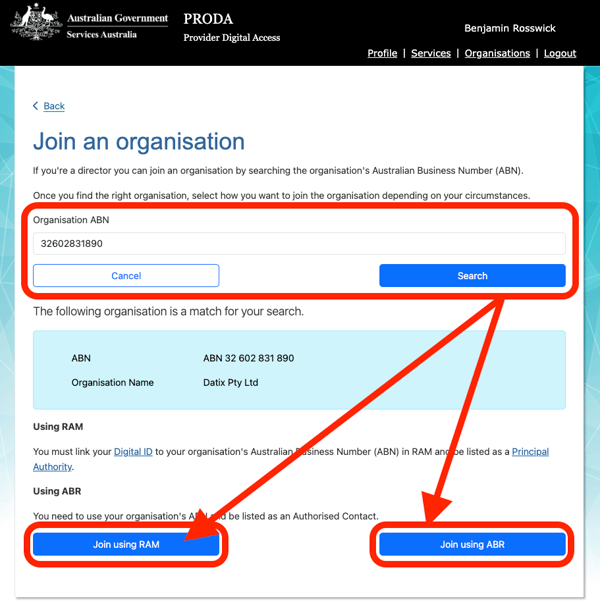
1.2 Click 'Join an Organisation', enter your organisation's ABN and click 'Search'. Assuming your organisation details match, click either of 'Join using RAM', which requires you to be listed as a Company Officer on Relationship Authorisation Manager, or 'Join using ABR', which requires you to be listed as a Company Officer on the Australian Business Register.
The number one reason joining an organisation fails is because of a mismatch between your name as listed in PRODA (see top-right corner of the screen) and the listing in DigitalID (RAM's source) or the ABR. If you have a middle name in one but not the other, you'll need to contact PRODA support on proda@servicesaustralia.gov.au to manually link your account.
Register an Organisation
1.3(a) Click on the Register New Organisation menu option.

1.3(b) Fill in your organisation details based on your details in the Australian Business Registry and press Submit. If you do not know your details, you can check them online (https://abr.gov.au/).

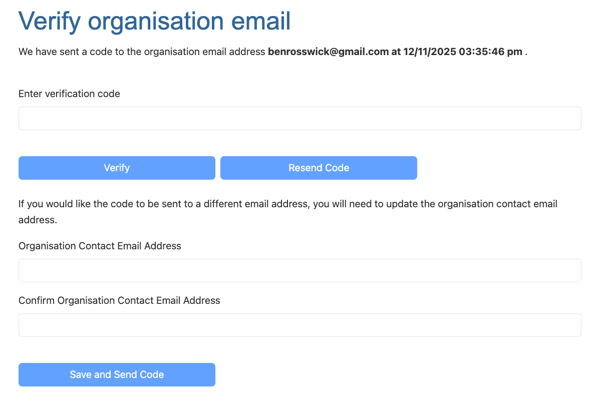
1.3(c) Verify your email address and you will see the Manage my organisation screen. Write down your PRODA RA number as you will need it in Part 2.
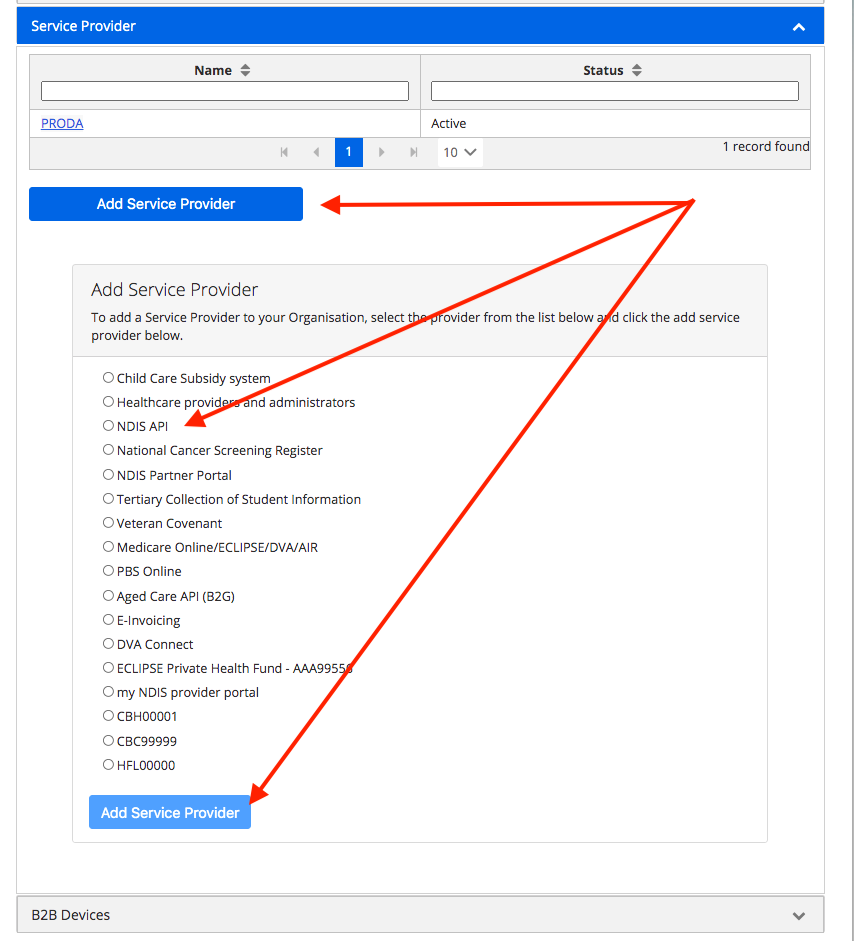
1.4 Adding NDIS API Service Provider
1.4(a) Click on the Service Provider menu option under 'Manage my organisation'

1.5(b) Click on the Add Service Provider button, select the NDIS API option and then click on the Add Service Provider button at the bottom of the page.
1.5 Adding a B2B Device
1.5(a) Click on the B2B Devices menu option

1.5(b) Click on the Register New B2B Device button.

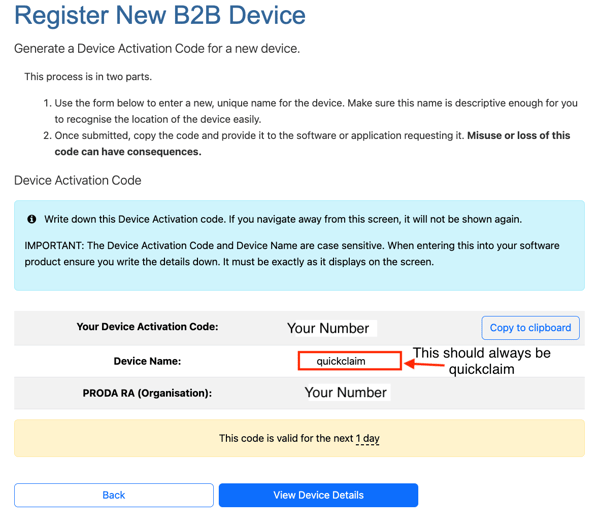
1.6(c) Enter 'quickclaim' (all lower case) as the Device Name and then click on the Register Device button.

1.5(d) Write down your Device Activation Code as you need in Part 2. Also check that your Device Name is quickclaim (all lowercase).
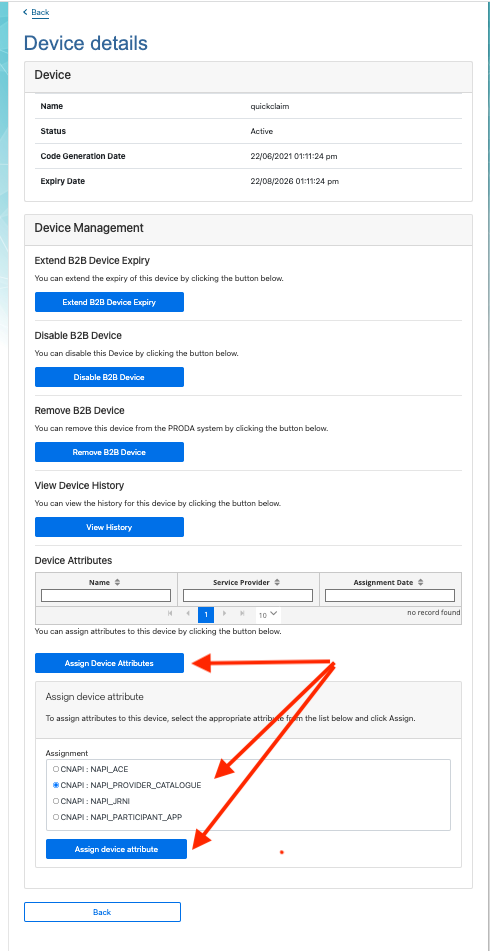
1.5(e) Connecting NDIS API to your device.
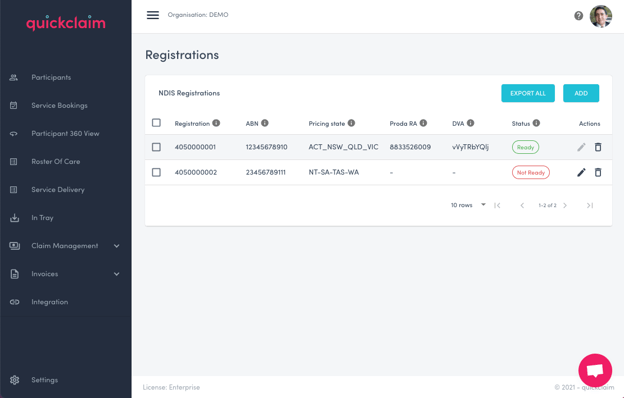
2. Add your NDIS Registration Details in quickclaim
For New Customers
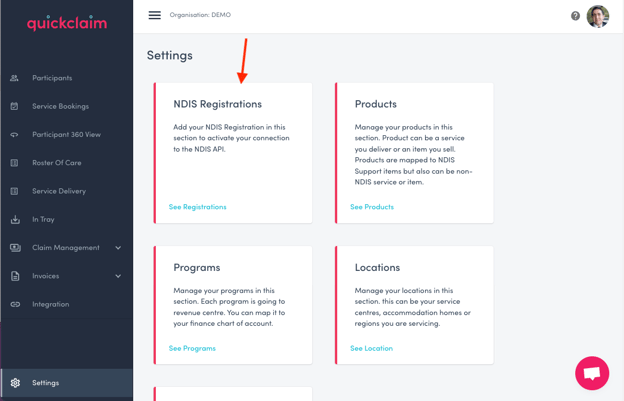
Login to your quickclaim account (https://billing.quickclaim.io/signin) and click on Settings from the left-hand menu.
Add Legal Entity
In order to add Registration, the legal entity needs to be set up beforehand. You can set this up by clicking on Legal Entity under settings, clicking on the Add Legal Entity button and entering the required details like ABN and Legal Name to add a legal entity.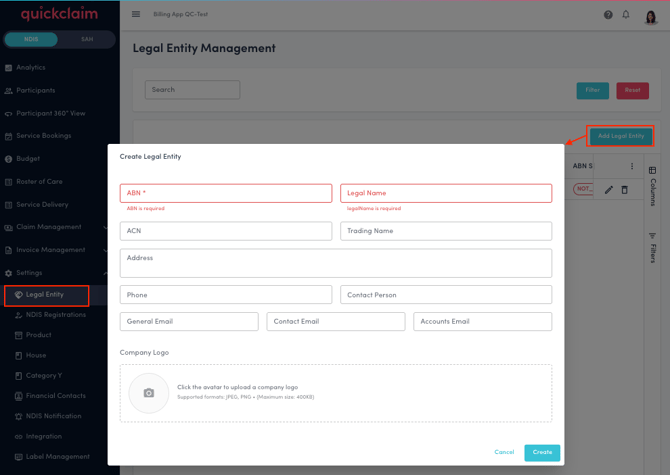
Add NDIS Registration
Once the legal entity is added, click on the NDIS Registrations under settings(or go to https://billing.quickclaim.io/app/registrations).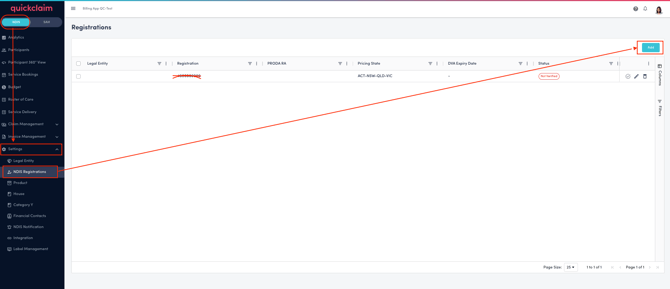
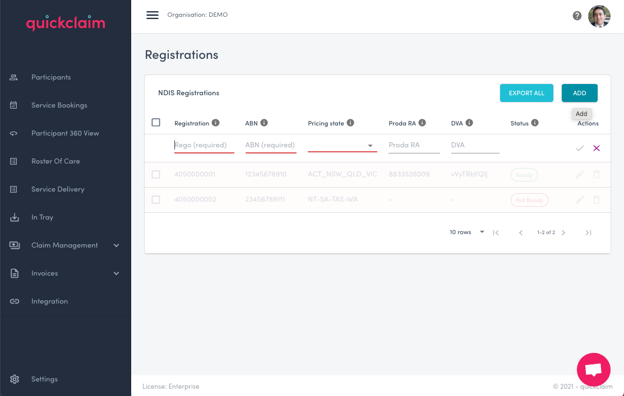
Click the Add button in the right corner, and fill in the following details:
- Select Legal Entity
- Add NDIS Registration
- Select Pricing State
- Add PRODA RA (optional)
Click on "Add Registration" button to add the NDIS registration.
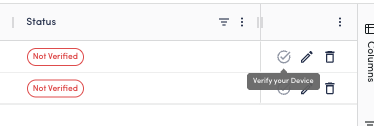
Verify your Device by clicking on check icon within the row. Once verified, when the API connection is live the status will show as "ready".
For Existing Customers
Sign in to your quickclaim account (https://app.quickclaim.io/signin) and click on Settings at the bottom of the left-hand menu and click on the NDIS Registrations box (or go to https://app.quickclaim.io/app/registrations).
2.2 Click the Add button under NDIS Registrations and fill in the following details, then click the green tick to save.
- Registration: Your NDIS Registration number
- ABN: Your Australian Business Number
- Pricing State: This is the states where your registration is active
- PRODA RA: Your PRODA Registration number, which you wrote down in step 1.4
- DVA: Your PRODA Device Activation Code, which you wrote down in step 1.8
When the NDIS API connection is live the status will change from Not Ready to Ready