.png?width=512&height=100&name=Logo%20(side-by-side).png)
Payments can be held for several reasons, including:
- An invoice has been cancelled while it is already in the payment process.
- You identify an issue, such as a potential duplicate claim, and need more time to review it before paying the provider.
- You want to manually pause a payout for any other reason.
- A quickclaim validation rule identifies an issue and automatically places the payout on hold. Examples may include:
- A cancellation request is in progress.
- The provider has been blacklisted.
- Confirmation of Payee (CoP) validation has failed.
- Another payment or validation rule has been triggered.
Note: Only payment allocations with a Pending Payment status can be placed on hold.
How to place a payment allocation on hold
To manually place a payment allocation on hold:
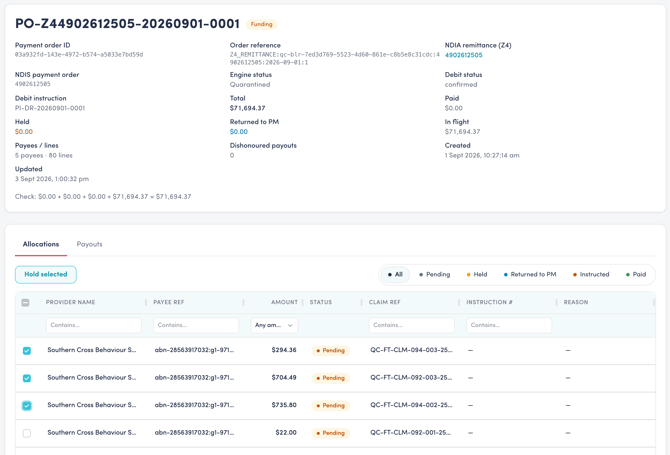
- Navigate to Payment Orders (you can also find the payment order for a specific invoice by opening the invoice and inspecting the 'Settlement' tab).
- Open the relevant payment order to view its payment allocations.
- Select the payment allocation you want to hold using the checkbox on the left.
- Click the Hold selected button at the top of the table.
- Enter the reason for the hold and confirm.
The payout will then be placed on hold.
How to release a held payment allocation
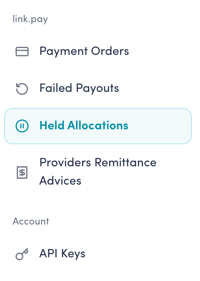
You can find all held payment allocations under Held Allocations in the left-hand menu.
For each held allocation, you have two options:
- Release — releases the allocation so the payment can proceed to the provider.
- Return to PM — returns the funds to the Plan Manager's account instead of paying the provider.
Process
a. Navigate to the Held Allocations page.
b. Select one or more payment allocations you want to action.
c. Click Release or Return to PM.
d. Enter the reason and confirm the action.
The system will then move the allocation into the appropriate payment workflow.