.png?width=512&height=100&name=Logo%20(side-by-side).png)
Sometimes the NDIS portal does not automatically generate a remittance advice, or doesn't automatically send the remittance advice to quickclaim. In these cases, you can manually upload the remittance advice to keep your reconciliation and financial records accurate..png?width=670&height=377&name=Received%20money%20in%20Bank%20(1).png)
This guide explains both scenarios:
When the remittance exists in PRODA and needs to be imported into quickclaim
When the remittance advice exists in PRODA, all you need to do is download it from PRODA, ensure that the file matches the sample file provided in quickclaim and simply import the file into quickclaim. Follow the simple steps below:
Step 1 — Download the missing remittance advice from PRODA
-
Go to the NDIS Provider Portal via PRODA.
-
Sign in with your PRODA credentials.
-
Navigate to the Payment or Payment Reports section in the portal.
-
Search for the payment period that is missing in quickclaim.
-
Download the Remittance file (usually in CSV or XML format).
Tip: Ensure you download the correct file for the batch/claim period you are missing.
Step 2 - Importing the Remittance into quickclaim
Once you have the file from PRODA:
-
Log in to the quickclaim app.
- From the main left-hand side menu
- Go to Claim Management.
-
Select Remittance.
- Click on the Import button on the right-hand side.
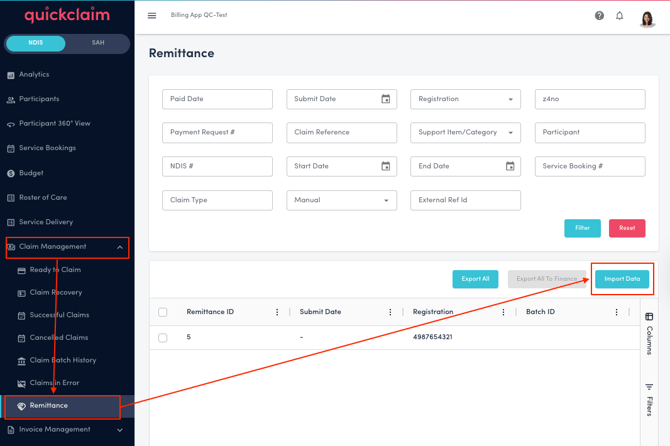
- On clicking the Import Data button, a modal pops up with the sample file you can download.
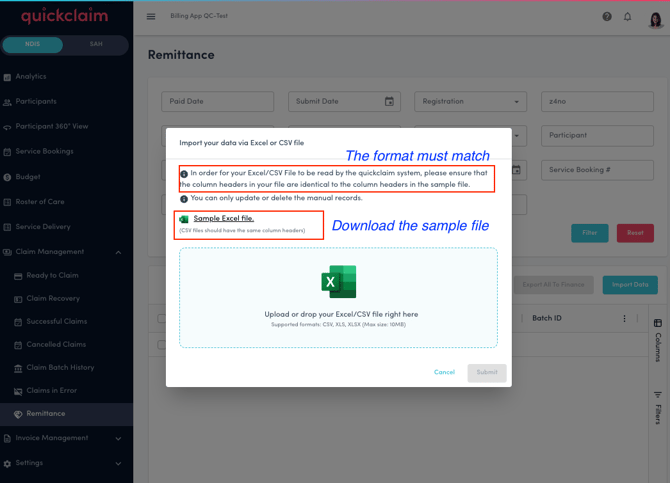
- In order for your Excel/CSV File to be read by the quickclaim system, please ensure that the column headers in your file are identical to the column headers in the sample file before uploading the file.
- Once you have ensured that the file is of the correct format, upload it to the modal by selecting the file or dragging and dropping. Click on the Submit button.
- Once uploaded, the system returns details of any errors present in the file, and you can choose to exit without importing or proceed.

In order to proceed, click on the Continue with the import button. - Your remittance file will successfully be added to quickclaim and will show up in Tableau reports.
When PRODA has not generated a remittance at all, you need to create one manually and then import it to quickclaim
Sometimes NDIS does not generate a remittance at all, even though a payment has been made. This happens occasionally, especially for certain payment scenarios or system delays.
In this case, you will need to create a manual remittance file to keep your data complete.
Step 1 — Create Manual Remittance File
-
Gather required information: Collect the details from
-
Your bank statement
-
Your claim batches
-
Payment amount received
-
Date of payment
-
Related claim reference numbers (if available)
-
-
Go to quickclaim Claim Management> Remittance and click on the Import Data button to get the sample file for the remittance.
- Fill in the Sample File with the data you've gathered in step 1.
- In order for your Excel/CSV File to be read by the quickclaim system, please ensure that the column headers in your file are identical to the column headers in the sample file before uploading the file.
- Once you have ensured that the file is of the correct format, upload it to the modal by selecting the file or dragging and dropping. Click on the Submit button.
- Once uploaded, the system returns details of any errors present in the file, and you can choose to exit without importing or proceed.
In order to proceed, click on the Continue with the import button. - Your remittance file will successfully be added to quickclaim and will show up in Tableau reports.