.png?width=512&height=100&name=Logo%20(side-by-side).png)
Process to Issue Invoices
Before issuing invoices, it is very important to perform a completeness check on the Support at Home claims> Claim History Page.
The "Ready Invoice" column must have a green tick before you can issue the invoice. If there is a red cross instead, click on View Data and view the data to investigate where the issue is. It is important to confirm the data is correct before invoicing.
Step 1 – Review Transactions
- Open the Ready to Invoice page in Support at Home module.
- Review the list of processed transactions.
- Confirm the amounts and invoice splits are correct.
- The invoice recipient can be updated at this stage if needed by clicking on the Bulk Update button.
Step 2 – Invoice all or Invoice Selected
- It is important to issue invoices claim by claim. In order to do this, filter for a specific SAH Claim ID to filter out the records for that ID.


- The recommended process would be to do one round of invoice only for "Department" and one round of invoice for "Contributions and Gap Payments".
The main reason to do this is because Services Australia pays per claim id in bulk. So if all the department invoices are created in 1 batch, the total amount of the batch will be same or close to the payment received from Services Australia which will make reconciling a breeze.
- For this, filter Paid By to Department.

- In the next round you can use the remaining Paid by categories to issue invoices.

It is important to check that the data matches, the credits are all accounted for. - For this, filter Paid By to Department.
- Click Invoice Selected or Invoice all button based on your preference.
- Quickclaim will automatically:
- Generate the required invoices
- Split invoices by payment type
- Send invoices to the finance system
Step 3 – Monitor Invoice Status
After submission:
- Government invoices can be tracked against Service Australia payments
- Co-contribution invoices can be tracked in the AR module
Cancellations or Adjustments
If there are cancellations or adjustments in the payment, credit notes are automatically created in AR module.
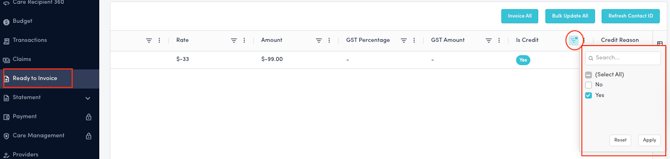
To filter out the credit notes, under Ready to Invoice, find the "is Credit?" column and on the filter check yes. This will filter all the credit notes with negative amount that was created in AR module.
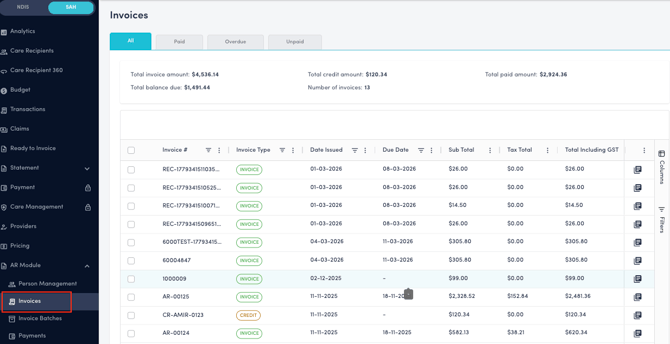
In the invoices page under AR module, it will contain all the invoices as well as the credit notes.