.png?width=512&height=100&name=Logo%20(side-by-side).png)
Accessing the Participants Page
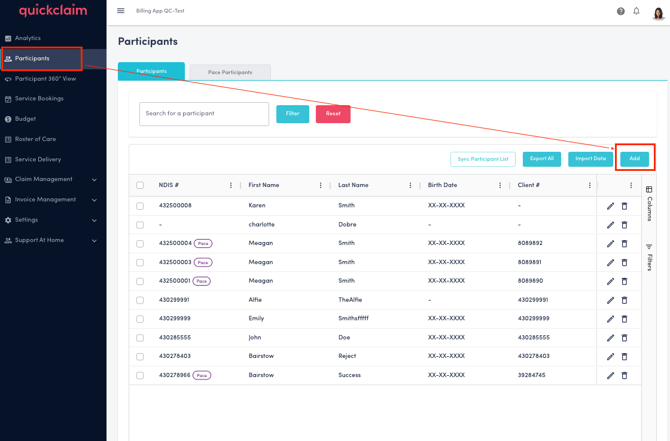
Once you log in to quickclaim, navigate to the Participants page.
Here, you’ll see several action buttons that allow you to manage participant records.
➕ Adding a New Participant
To add a new participant manually:
-
Click the Add button at the top right corner of the page.
-
A form will appear where you can enter participant details.
Participant Details Form
Complete the following fields:
| Field | Description | Required |
|---|---|---|
| First Name | Participant’s first name | ✅ |
| Last Name | Participant’s last name | ✅ |
| NDIS # | Participant’s NDIS number | |
| Client # | Internal client number (if applicable) | |
| Birth Date | Date of birth of the participant | |
| Pace Enrolment Date | Participant’s enrolment date in PACE if any(DD-MM-YYYY) | |
| PLSL Invoice Recipient | Recipient for PLSL invoices | |
| Agency Invoice Recipient | Recipient for agency invoices | |
| Registration | Registration type or category | ✅ |
| Client Status | Current participant status (e.g., Enabled or Disabled) | |
| Other User Fields | Any additional fields specific to your setup |
3. Click Add Participant to confirm and save the new record.
4. Click Cancel to discard the entry and return to the Participants page.
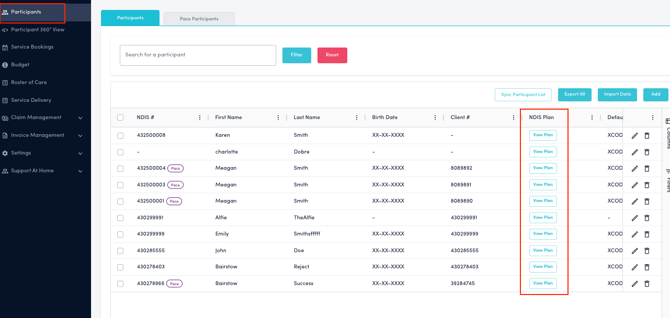
View Participant Plan
To view a participant’s plan:
-
Go to the Participants page.
-
Locate the participant you want to view. Filters can be used to filter out a specific participant.
-
Click View Plan under the NDIS Plan column.
This will display the selected participant’s plan details if any. No records may be displayed if the participant hasn't provided consent to view their plan.
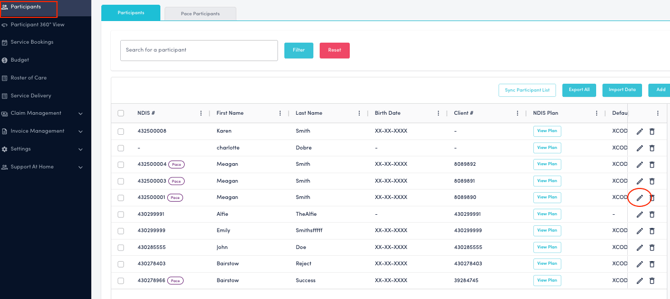
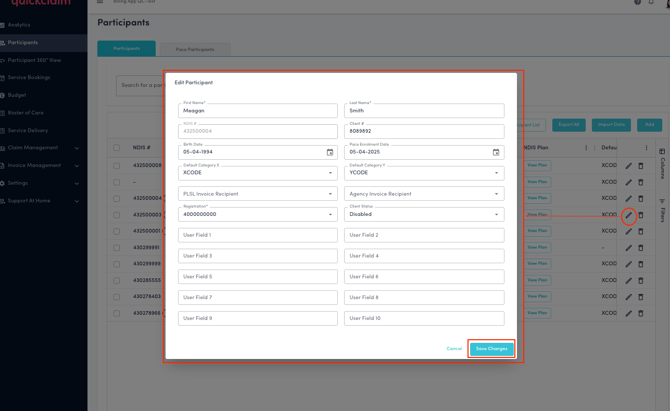
Edit a Participant
To edit participant details:
-
Click the Edit icon on the participant’s row.
-
Update any fields as required.
-
Click Save Changes to confirm.
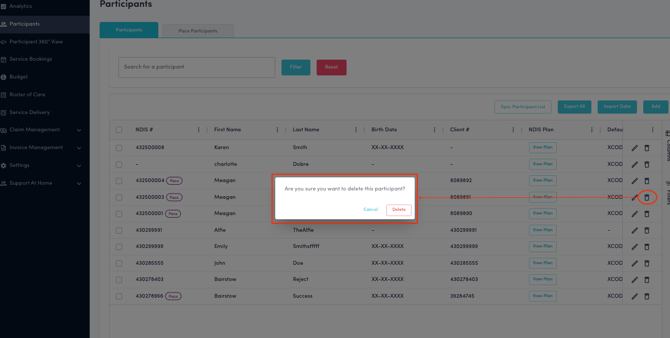
Delete a Participant
To delete a participant:
-
Click the Delete icon on the participant’s row.
-
Confirm the deletion when prompted.
-
A “Delete Success” message will appear once the participant is removed.
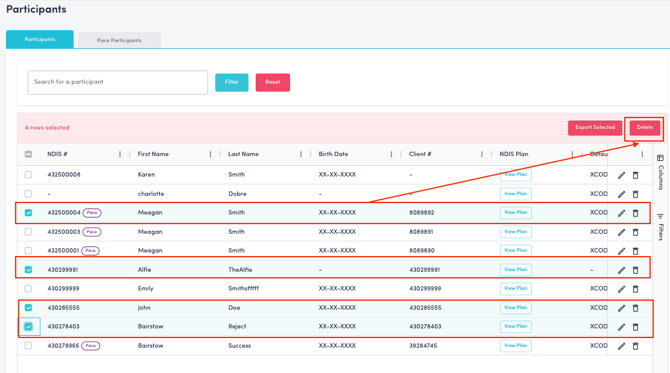
To delete multiple participants:
-
Select the participants by ticking the checkboxes in front of each name.
-
Click Delete button on the top right corner to delete all selected participants at once.
-
Confirm the deletion in the confirmation modal.
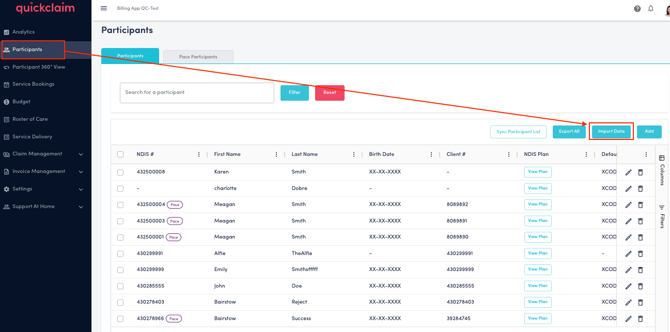
Export Participants
You can export participant data in two ways:
-
Export All:
Click the Export All button at the top of the participant table to download all participant data.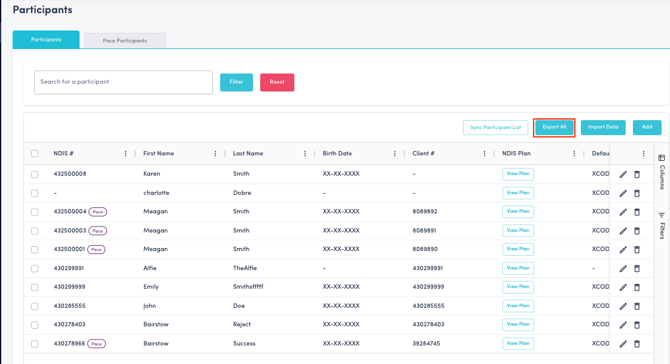
-
Export Selected:
Select specific participants using the checkboxes, then click Export Selected to download only those records.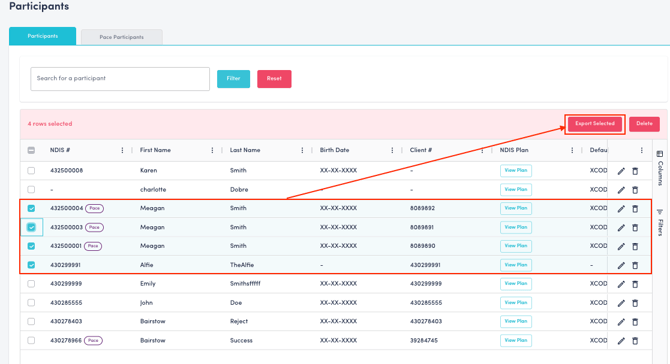
Bulk Import, Edit, or Delete
To upload or modify multiple participants at once:
-
Click Import Data on the Participants page.
-
Download the sample file provided.

-
Fill in the Excel or CSV file.
-
Ensure your column headers are identical to those in the sample file so that quickclaim can read the data correctly.
-
In the sample file there is an Action column. In the Action column, use:
-
I for Insert
-
U for Update
-
D for Delete

-
-
-
Enter all required details for each participant on the sheet. On the sample excel file, rows 2 to 5 are given as sample entries. These will be ignored and won't affect your import when there is a # on column A.
-
Drag and drop or upload your completed file.
-
Click Submit to upload all changes in bulk.
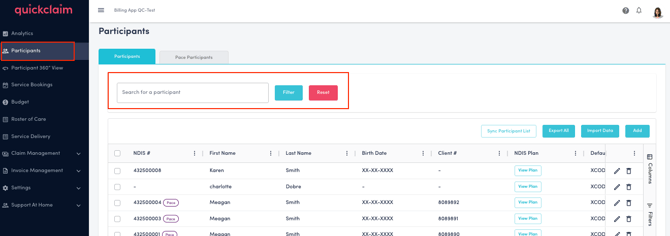
Filter Participants
To filter participants:
-
Use the Filter text box to search for specific participants.
-
Click Reset to clear the filter and display all records again.
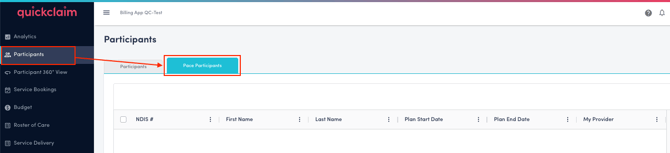
PACE Participants Tab
The PACE Participants tab displays all participants registered under PACE.
This list provides a comprehensive overview of all PACE-managed participant records.
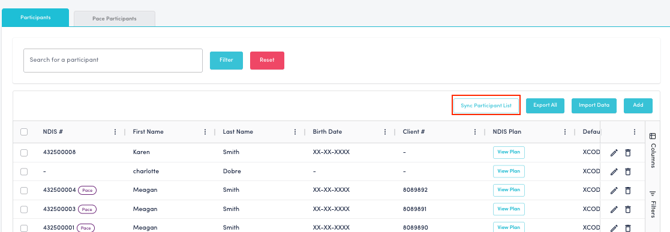
Sync Participants List
Clicking on the Sync Participants List button will sync the participant list with NDIS.